Progress continues. I wish I had more to show you, but durning this phase of getting the shell leak free and sealed, you see very little day to day progress. Things are just not visually dramatic right now...
The new belly pan sections were re installed. I do not have a photo that is not blurry, but all the belly is completed and the belt line has even been riveted back on. She can roll now if needed.
This trailer's owner has been lending a hand, a couple of days a week. Instead of paying me to do it, he has been doing the real ugly dirty stuff. Previously, he cleaned years of grime and mold off of all the interior skins. Lately his attentions have turned to helping me get a water tight shell. This trailer has multiple layers of various sealants applied over and over in an attempt to get the seams sealed. There is painters caulk, white silicone, clear silicone, blue gasket sealant, Parbond, and the original sealant, Vulkem. The approach was to just keep piling it on instead of removing the old garbage and sealing it properly. This is one of those situations where I say to myself; "They thought they were doing the right thing."
Dramatic results. This took a combination of methods which I will explain shortly.
I will use this photo as an example of how the old sealants were removed. Above you see the open for the tail light assembly. There are four sealants in this image. There was first some Vulkem used. It was applied at the factory when the tail lights were installed. It was an epic fail as I will point out later. Someone then applied Parbond. I am not a fan of Parbond. It gets rather hard over time and like the Vulkem, is very stubborn to remove. On top of those two, white painters caulk was applied. This is the easiest sealant to remove. On top of all that goodness, copious amounts of clear silicone was applied. It still leaked because nothing after the Vulkem has a good surface to bond to. It must all be cleaned off and the surface made spotless for the new sealant can be applied and more importantly, to bond.
So here is what I did;
I first rubbed briskly, with a wooden stick to remove all the "stuff" that would come off using just friction.
Next, MEK was applied with a squeeze bottle to the sealant line. I use a rag to catch the dribble. (NOTE: MEK is a very strong solvent. You should wear a respirator and gloves. It is one of those listed in California as a cancer causer. It is. It is super strong stuff. I have done my duty by giving you a safety lesson) I let the MEK set for a few minutes. When all signs of moisture are gone, it has set long enough. I then repeat.
Next I use the wooden scraper to rub all the "stuff" off. Everything but the Vulkem and Parbond usually has come off at this point.
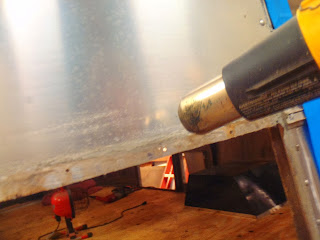
I break out the heat...
... and more scraping with a wood stick. Why wood? Glad you asked. Wood does not (easily) scratch the aluminum. It will, when too much sealant builds on the edge of the stick. In that original sealant is aluminum from the construction of the trailer. Not a lot, but some.
After the bulk of the Vulkem and Parbond has been scraped off, you can clean the rest with MEK. It dissolves it, so clean your rag often.
Eventually, with persistence, sweat, profanity, and a little blood letting for good measure, the old stuff will be all gone.
On seams there is one more step; I use a dental pick to reach in and pull as much old sealant from the seam as I can get. BE CAREFUL WITH METAL ON METAL.
I want to talk about these tail light assemblies. 1968 was the first year for this new tail light assembles. I do not think it was thought through very well. The cast assembly has very little surface area and relies on it since it was surface mounted. When they were cut out for, the worker got very close to the edge on both of them. This is destine to fail in an epic manor. If you own a 1968, or any trailer using these type of tail lights, I strongly suggest you take a close look at this spot. The original sealand was not put between the surfaces, it was applied around the unit hoping to keep the water out.
You can see where the water flowed in over the years.
I like to dry fit everything. I can make adjustments this way before it is locked in with rivets. The edge was marked on the skin so when the new Vulkem is applied, I can be sure to get right to the edge. After all the skin under the assembly had copious amounts of Vulkem applied right to the edge, it was cleckoed in and them actually riveted.
The assembly requires a bead of sealant on the outside, so I taped it off right to the original sealant line. A smooth bead was created using my finger and then the tape pealed back. The came out very well and within the assembly, the skin is completely covered with Vulkem.
Next post I will be sure to have some good shots of how this area came out and how the belt line looks all put back in place.


