Monday, October 28, 2013

1968 Caravel 4 of


Work progresses. The templates, made before the shell was lifted, were brought out.


The sheets were cut to size and also cut for Lamellos ("biscuits" to you non wood workers, or those younger wood workers. Lamello was the company that invented the plate joining system way back in the day and it was what it is called by the older cabinet makers. Now a days, everyone calls them biscuits. I ask for sausage gravy when I hear someone call it a biscuit.)


The Lamellos align the sheets and help strengthen the seam when they are glued together.


Here you see how the template comes into play. The outside of the curve is 1 3/8"beyond the template (verify your year with a tape measure. Years vary, factories vary, one days production varies from the next. Assume nothing) so I cut a 1 3/8" block and traced the cut line. 


All the sheets were cut out and dry fitted into place.


The templates took all the guess work right out of this phase. I cannot emphasis the importance of making an accurate template. Enough said on this. 
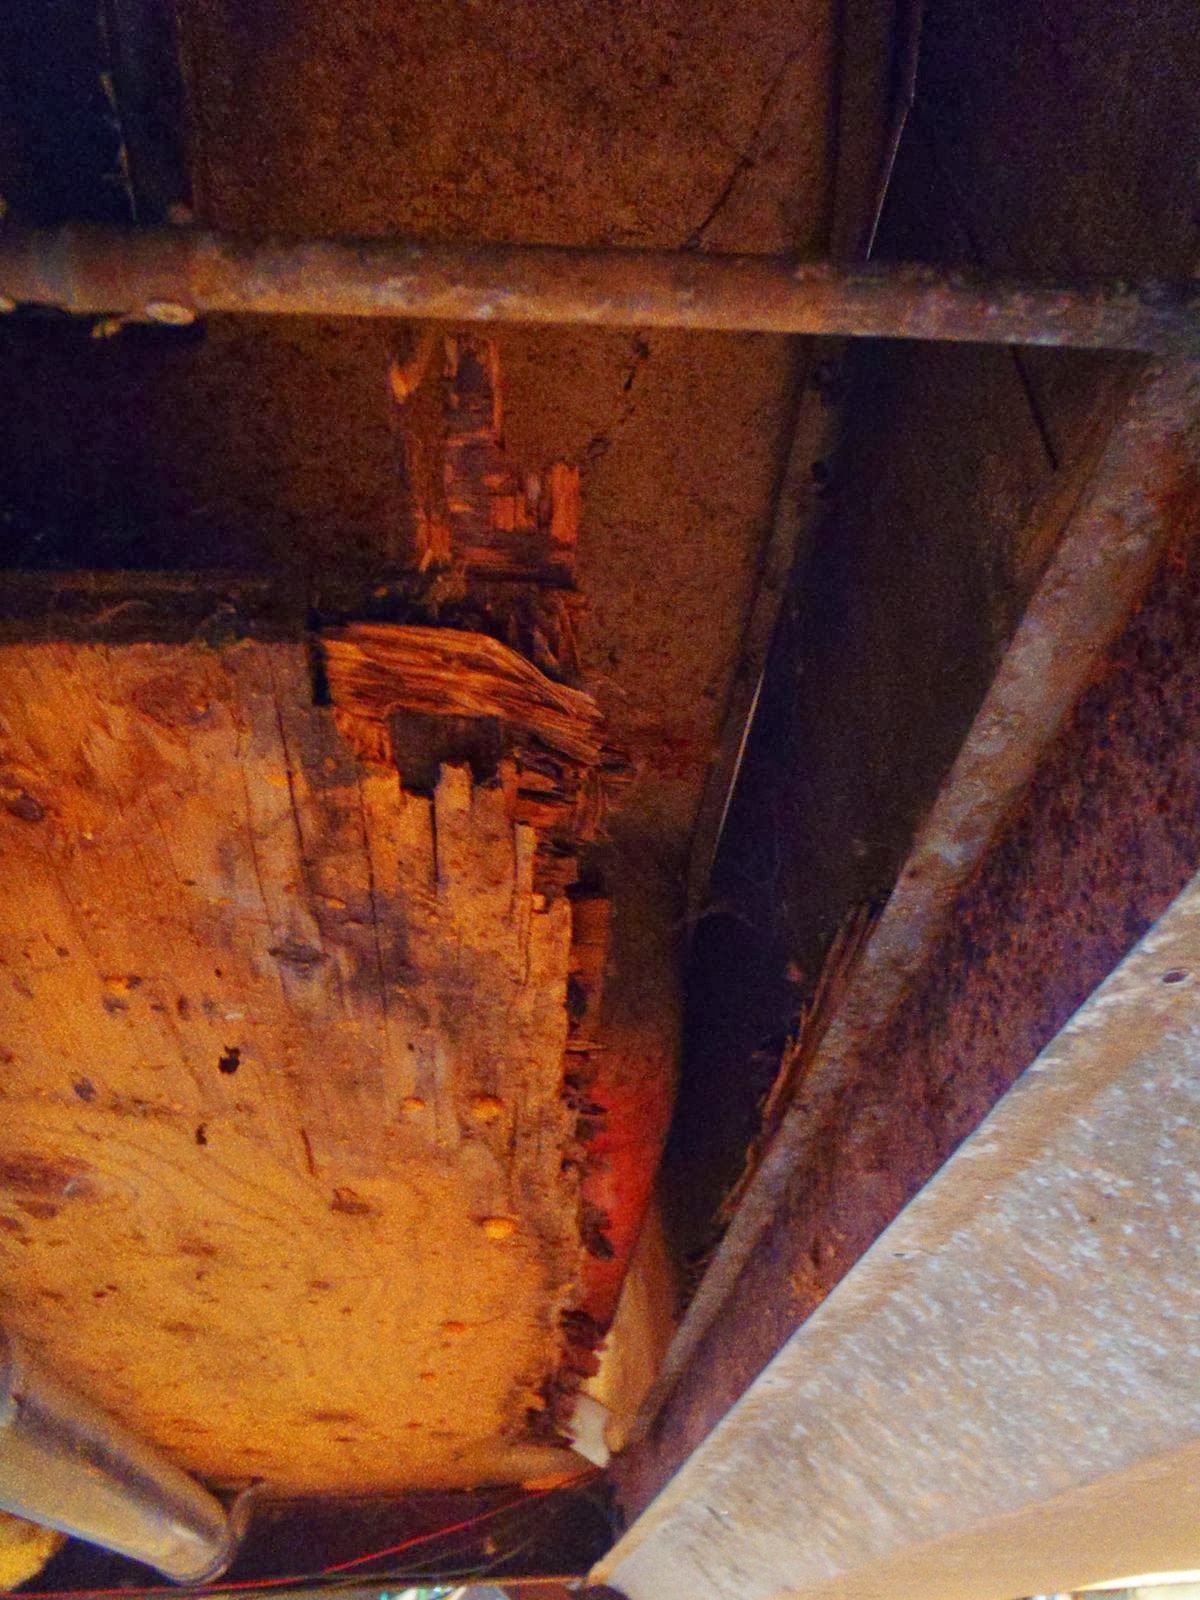
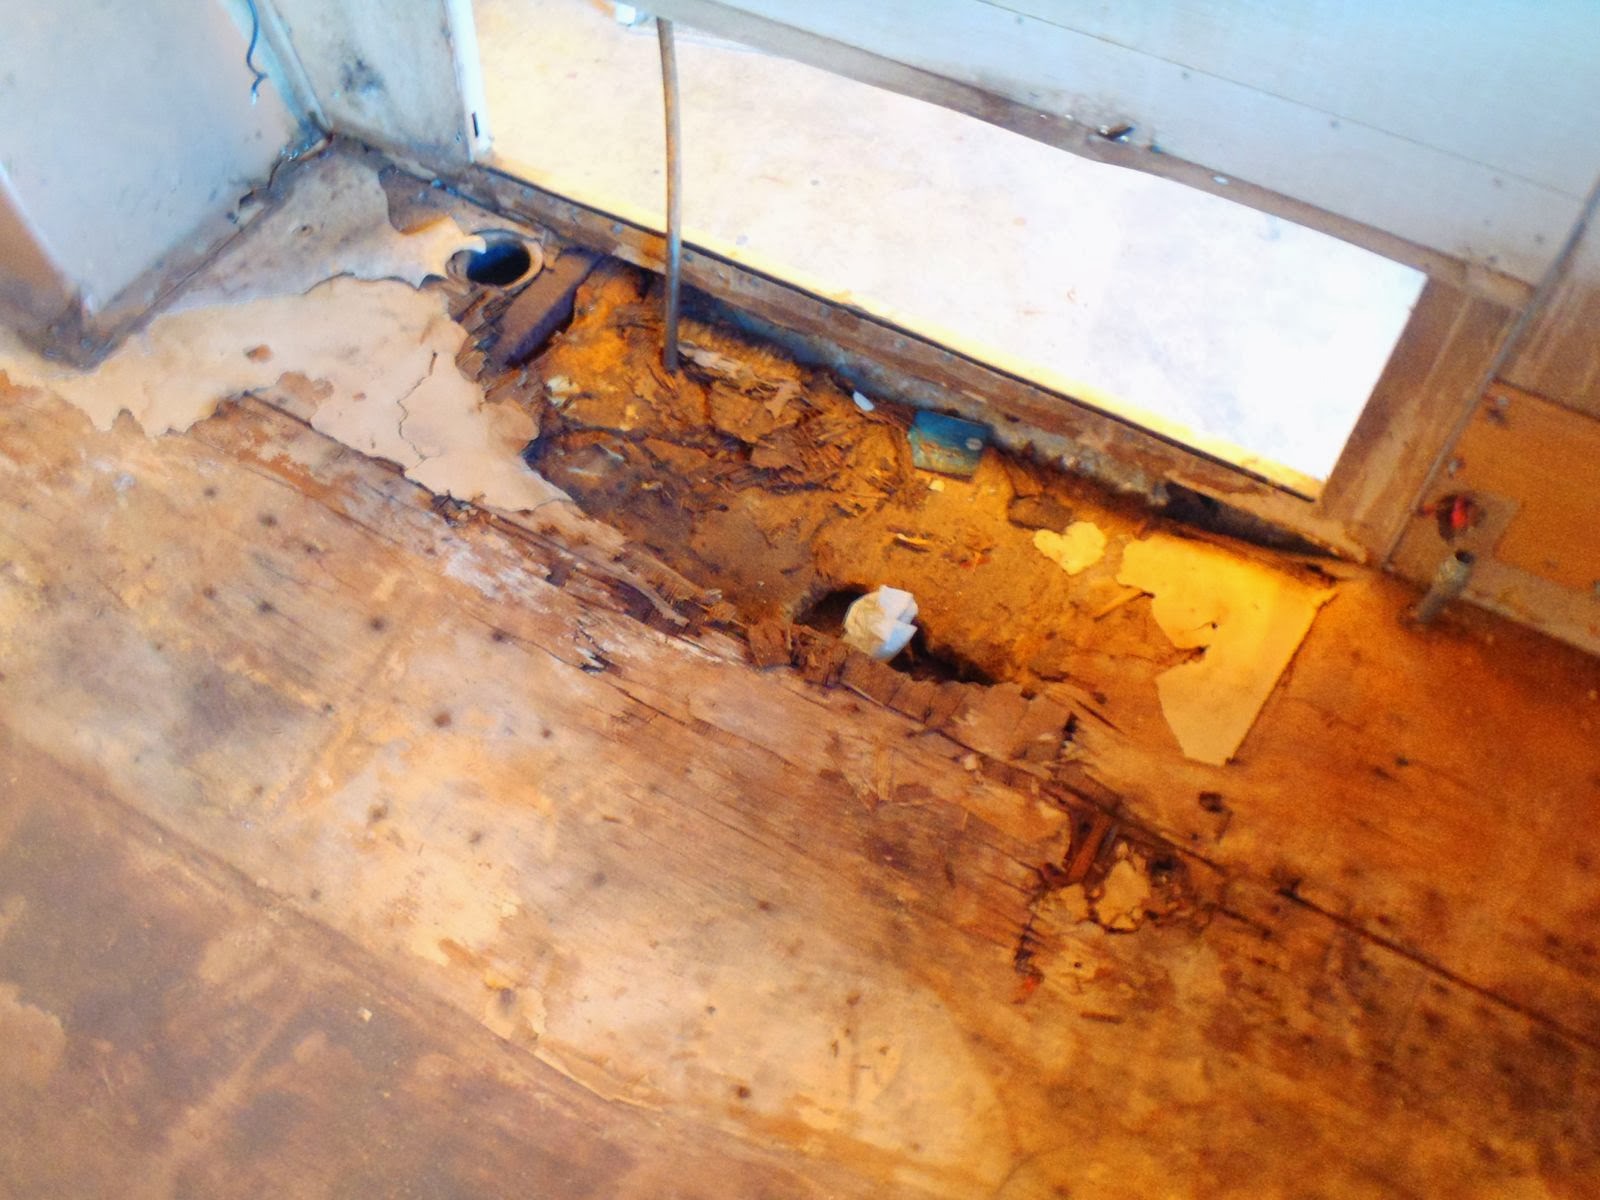
The floor was then pulled back off and the frame was treated.


We have a lot of things going on here with the frame treatment and painting;


Next all the metal parts that will be seen, were sprayed with two coats of epoxy primer. This is a two part primer. It is a super tough product that is designed to work as a system with the PPG auto paints I use. Mixture proportions and timing are extremely important with these types of finishes. The various stages literally bond together into a complete coating system.


Next, two coats of base were sprayed on. It is a silver metallic base coat. I am not a big fan of silver, but it was specifically requested. The photo never does the color justice. After the base coat dried 30 minutes, but no more than 4 hours, three coats of clear were sprayed on top of the base.


Here you see all the plywood glued together into one big sheet. Sorry there are no detailed images of that step. Long clamps and pinch dogs kept the sheets together while the glue set up. You may also notice that all the elevator bolts have been installed. Most of the channel has been bolted down also. Not in the images either is the layer of Reflectix on the underside of the subfloor. 

Monday, October 21, 2013

Inside Fred


As promised, here are the interior photos of the 1964 Overlander known as 'Fred.' Great pains were taken to make Fred look as original as possible. Fred was a restoration, so by definition it was returned to its original condition. As you may notice, some aspects are not original to 1964, but the overall feel is very much 1964.


Mission cherry was not a 1964 stain option, but it sure looks great on the oak that was original. 


About half of the furniture has been rebuilt, but you would never know what was and what was refinished.


A number of modern conveniences were added to the restoration. This cabinet was altered to house the blue ray player and stereo. Surround sound was added also.


A new, low profile air conditioner replaced the original unit. Both roof vents were replaced with Fantastic Vents.


Shelving was added to make for better use of the existing cabinets.


This is a gem of an addition. A ceiling-mounted flat screen. It folds up for travel, or when not in use...


it folds down when needed. It can face the salon, or turn around to be viewed in the bedroom. The underside of the cabinet above the stove was clad in aluminum so it could be cleaned easier.  


All the plastic bathroom parts were repaired and painted with a metallic paint that mimics aluminum very well. This photo does it no justice. The color also picks up similar colors in the curtains and upholstery. The toilet seat cover is leather. I would love to say it is fine corinthian leather, but it's just real leather.


This cabinet originally had little shelves. 


Now it has pull out drawers. A great place for all those assorted bathroom items.


The counter tops were all remade using a truly retro pattern. I have used this laminate line a number times now. It is always a big hit since it looks so original, even though it's not. The aluminum edging is always a big hit, also.


This is a great feature. 


My favorite addition to the trailer is this new, old stock 1964 oven stove combination. Yes, it is a brand new, never used stove. You could never make up that sun gold yellow color. It still has the sales decals on it, as you can see. I am also very fond of the way I trimmed out the stove opening with aluminum.

I hope you enjoyed seeing the interior of this project. Once again, I am very pleased with the finished product. I hope you will stay tuned in for the 1968 Caravel currently under way. 

Wednesday, October 16, 2013

1968 Caravel 3 of...


Shell lift off is always a big event. The Caravel went through this hurtle last week. I set up my gantry in the back of the shop. With the Caravel being so short, I have the luxury of lifting the shell indoors and still having enough room to work freely.


Everything went fine except for that one rivet that held tight. The shell started to lift evenly and then an errant rivet shank was still in place, holding the rear corner. The shell tilted slightly in it's sling. It is very secure, but looks precarious the way it hangs. It will go back level when it goes back down on the refurbished chassis. The floor rolled out with zero effort.


The floor has seen much better days. About 40% is still intact, the rest is toast. It literally crumbles like dry leaves. This is ironic, since water, not dry caused this issue. Carpenter ants put some effort into it also. I found a substantial nest in the floor.


It is all missing all the way across the rear. You might note the bumper hatch. The hinge half of the lid extends under the floor and under the C channel.


This is what I consider a design flaw. This is something I always change for it directs water right to the sub floor.


When the channel was actually removed, you can really see how much is gone. It is a good thing I made a template.


An unexpected treat given by a previous owner was all this spray insulation. The use of this stuff is in hot debate over on the Airforums. There is no debate over it in my shop. The stuff SUCKS! It keeps the floor damp and the mice absolutely love it.


Fortunately, the foam did not bond well with anything but itself.


I expected more frame damage than I actually found. The damage I did find was significant up front. The forward cross member was completely detached on the curb side where it meets the frame rail. It is no wonder the rivets into the hold down plate had all sheared off


The second to last cross member also had broken loose. Both were replaced with all new material.


The front curb side outrigger was half rotten off.


I just made a new one out of one of the cross members I cut out.


Next all the bad metal was cut out of the frame so I could clean up the area to be welded really well.


I then rolled the frame outside and jacked it up to a good working height. 400 pounds of sand blasting medium later, all the loose metal, scale, and major rust was gone. I only sand blast it to shiny metal where it will be exposed. The POR15 paint system I use on the frame works better if the metal has a little rust still on it. 


A new forward cross member was remade as was a new hold down plate. 


Here is the frame all repaired. The new metal has all been treated with Marine-Clean and it is all ready to be treated with POR15.


Sunday, October 13, 2013

Follow Up to the Last Tip...


This is why you make a template BEFORE you take it all apart. How would you or could you ever possibly create the exact curve of the back end? 

Tuesday, October 8, 2013

Last Time for This Tip...

I too am a little slow on the up take. So for the third time, I am going to go over a VERY important aspect of floor replacement. I hope some of you will learn a very important lesson from this little tutorial. You may be a do it youselfer or you might just want to know how it is done.


DO THIS BEFORE RIPPING OUT THE FLOOR OR REMOVING ANYTHING BEYOND THE INNER SKINS. YOU WANT TO GET THIS RIGHT BEFORE THINGS START TO MOVE.

Very frequently the rear of an Airstream is totally rotted out. The original floor is not going to allow for a proper reproduction of the outside curve. Even if the sub floor is solid, it is not going to give you the proper location of where the C channel is actually supposed to go when put back. The curve was cut by a guy(usually a lower paid, apprentice type guy) with a jig saw. It is not perfect under the channel, it varies. If you guess or extrapolate what the curve is you will probably get it wrong. If you follow my system, you will always put it back EXACTLY where it is supposed to be. The shell will go right back where it was. The holes will all line back up and you will be a very happy camper. If you change the position of the channel when you put it back, you will drastically change the shape of the curve without intending to do so.

What I do, is make a template of the inside edge of the C channel. The C channel always goes back right against the template.


I cut 6" rips of 1/4" luan plywood. DO NOT USE CARDBOARD. It is too flimsy and will expand and contract dramatically with the weather. Luan is cheap and will remain very rigid. I take the rips and cut them up to the needed segments. Each segment is scribed to the C channel. I mark it, then cut it with a jig saw to the line. I then scribe it again, then sand to the line with a belt sander. I have scribed for many years so it usually takes me just two tries of the belt sander, but if it is not correct, I just sand more off till it is a perfect fit.


The scribed pieces are then glued together using hot melt. I then screw it together to allow the glue to set. Wood glue could also be used. A tip; Screw the rips down to the floor as you go. You are replacing the floor any how. Now with my template, I can make my actual piece of the flooring.

AT THIS POINT YOU CAN START REMOVING ELEVATOR BOLTS AND PROCEED TO DROP THE BELLY PAN. 


I cut a block of wood 1 3/8" wide to simulate the C channel minus 1/8" for clearance. I use that block to trace around the outside of the template.


This will give you a perfect reproduction of what was originally there. Another tip; mark all the joints between the channel on the template. When putting the channel back down, the template will then aid you in putting all back in order.

I am sure I will get numerous questions on this topic. Please feel free to ask and I will do my best to answer them.

Monday, October 7, 2013

Inside The 68 Caravel...


I know you all want to see the inside of the 1968 Caravel that is now front and center at FTW. Come on in, looking is free.


I am not certain but I think the fabrics are original. The interior is mostly all original. The angled dinette makes a double bed. The side gaucho makes a double also. There are bunk bed brackets above both sleeping areas but the bunks themselves are gone.


At some point someone laid 1/4" plywood on top of the original flooring. 


Spray foam was used to attempt to stiffen the floor being hidden by the 1/4" plywood. Both methods failed as you can see.


Looking forward...


The counter top was replaced at some point. It is kind of melting now. Particle board does that when it gets wet over and over.


All the important stuff is here and intact.


It is here, but very tired and worn out. I have a feeling I will make it look brand new.


I was hoping not to find this; aluminum wire. Legend has it that in 1968 copper was in short supply since the Vietnam War was raging. 


Due to short supply, Airstream used aluminum wire. Aluminum wire has been know to cause many short circuits and even fires. Luckily I found no evidence of it happening in this unit.


I began removing the entire interior in the reverse order it went in; front to back...


Notice the rubber hose clamped to the original copper line going into the toilet? I found A LOT of this type of repair.


Here is looking up at the back wall from the underside. Yes, that should be plywood where it is not. That my friend is a rotten rear end. 


From street side to curb side, it is all gone. 


The original copper line, rubber hose repair.


Numerous ruptures to the water lines.


Ruptures to the waste lines. It takes a lot of freezing to break ABS pipe.


Even the gas lines were ruptured.


All the traps were cracked. The plumbing system was dead. Flat and simple it is dead.


The interior skins show signs of years of dirt, mold, and grim. Water falls are a common sight.


Almost all cleared out.


Just a little more to remove.


The more I remove, the softer the floor gets.


The use of spray foam to stiffen soft floor was rampant. I just hope whoever did this thought they were doing the right thing. They were not, but I would like to believe they thought they were.

And now for the scary part...


A decorative cap...


... dresses off a rodent latrine.


That wall should be solid with insulation. The mice have put it to use for nests.


That too should be filled with insulation. It is not.


Remember the photo of the busted exterior rivets in the front. They are all sheared off. The hold down plate is doing absolutely nothing.


It is there, just not attached at all.


All gutted out looking back


Now, on to templating the interior c channel. It is actually done already but I will save it for my next post. Lifting the shell will be documented then also.