Thursday, April 14, 2011

A Visit From Tim the Tool man's Neighbor, Wilson AKA Wayne


More work has been progressing on the Double Door since my last post. Wilson has been busy stripping, polishing, and painting the interiors of some 1954 overhead lockers that are being repurposed. They came out very well as you will see later in this post. While Wayne worked on the overheads I spent a good amount of time fabricating the interior cabinet structures.


Once fitted, it was all removed to be finished. The interiors of the cabinets and all the side panels were sanded and finished.


I use a professional line of products by ML Cambell. I shoot two coats of sealer followed by two topcoats. Everything is sanded to 150 before any sealer goes on and every layer of finish is scuff sanded with 320 in between. These finishing products require personal protective equipment. It is all solvent based and most likely illegal in California.


The photo never does the grain any justice. This finish is still wet in this photo, but it will dry out to a #20 sheen. That is not dead flat, but dull in sheen. My client likes a finish like this. I usually use a #45 sheen which most call a satin. I must say, I am becoming very fond of the dull sheen.


Very poor lighting, sorry. On a side tangent; Why do halogen shop bulbs only last a few days? I have purchased the cheap ones at Harbor Freight for $1.50 each and they last 1.5 weeks. I have purchased the expensive ones at Home Depot for $2.50 a bulb and they last 2.5 weeks. What I do know about Halogen shop lights is they always blow out at the wrong times. That, and the bulbs suck. Tom, there is an experiment in this for a curious fella like you....


Back to the cabinets. Here is the auxiliary water tank on the curb side. A Dickinson propane fireplace will hang on that end panel to the right. That will not only heat the rear, but will also create a nice ambiance to the bedroom area. Face frames are still to follow.


Here is more of Wayne's handwork. He did an awesome job turning some worn cabinets to new again.

Friday, April 8, 2011

For an Anonymous Reader

I have been corrected by an anonymous reader. Someone out there does find axle swaps exciting. He or she asked I not post their comment, but it was along the lines of, "I find axle swapping exciting and you not posting pictures leaves me feeling like I missed out on something I wanted to see". Those are not the exact word, but more the jest of the comment. I hate to disapoint, so here are some before and after photos. Sorry, but I just did not take any "during" photos. One get really dirty changing axles and touching my camera during it is the last thing I want to do.


Here are the original axles on this sweet Sovereign that came in to the Works for a little swap out.


Wicked cool full moon hub caps! Wicked sagged out axles. -15 degree angle is not good.


Brand new #4000 Dexter axles. The axle tubes are 1/2" larger than the original #3400 axles and required a widening of the axle socket. Lots of sparks were flying while we cut out the metal. I like making sparks, it feels like mechanical victory.


Did you get a rise out of this? The trailer got a 4" rise and 800 pounds of extra carrying capacity.

I enjoy swapping axles. I enjoy it so much that, FTW is going to run a Spring/ Summer/ Fall Axle Swap Special. I will charge you $100/ axle to install them and the axles will be at cost. Measuring is easy as pie. I will hold your hand through all the info needed. When the axles arrive from Dexter you can drop off your trailer in the morning, go see Baltimore. Then pick up after lunch. I can send you off on any sort of adventure you desire in Baltimore, from a walking tour of the inner harbor, a museum tour, historic places, or my favorite off beat restaurants. I will even install Axis axles for the same price if they are ordered through Colin Hyde and drop shipped to my shop. I guarantee, you will not find a better deal for your money. Your trailer will be very glad too.

Thursday, April 7, 2011

I do more than repair trailers


I wear many hats and also provide more services than just trailer restoration and repair. I also do a bit of transport and inspection work. I have a very good client that asks me to do both services for him just about every month. Today he sent me to the Eastern Shore. To clarify, we, living West of the Chesapeake Bay, call it all the Eastern Shore. It is also known as DelMarVa for Delaware, Maryland, and Virginia combined. Some call it SlowMarva (a derogatory or compliment depending on your perspective) for it is still rather agrarian and under developed.
DelMarVa is good trailer hunting ground.


Many places have their bridges that they take great pride in. The Brooklyn Bridge, the Golden Gate, the Verrenzano, the list goes on and on. A cool fact is all these major bridges use so many gallons of paint that they actually all have their own colors. In Maryland we have the Chesapeake Bay Bridge and yes, Chesapeake Bay Bridge gray is an actual color. I am always impressed with this bridge and have crossed it hundreds of time. Every single time, The Bridge gives me a wonderful photo.


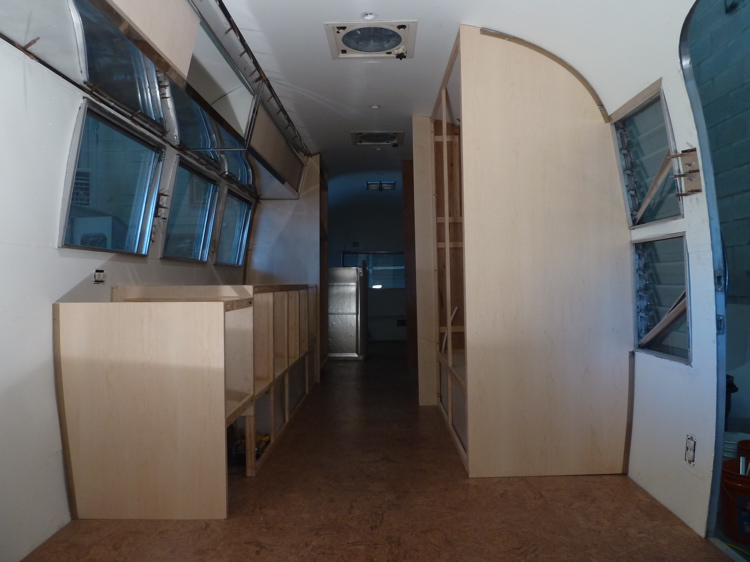
I was sent to pick up this trailer my client had bought and to transport it back to Baltimore. A 1966 Globetrotter with very nice straight skin. The interior has seen much better times and three windows were gone, but it still towed like a champ. I was also sent to inspect and figure a course of restoration for the other two trailers my client purchased.


This is Chris. Chris is a trailer hunter. He finds em and gets them out of the woods. Chris has been hunting trailers for many years now and has a fairly large collection of trailers in his yard. He was real friendly and knowledgeable about what he had. I had intended to hook on and roll, but instead spent close to three hours talking shop. Now these next few photos are of one that I was to evaluate. This one is going to get more than a few of you VERY excited. I am beyond excited that this trailer is coming into FTW for work.


What has an edge beaded like that? A flat end cap panel does. Flat? Yes, a segment on a thirteen panel trailer is flat when all the rivets are removed.


But wait, a thirteen panel has narrower panels. Confused yet? Look at that sexy eyebrow over the window. That window, that is not a Herh Standard, it is an earlier one...


Oh my, a glass bee hive indicator lens. What year was that used?


And that wonderful patina on a brass plate. Brass? #1447? 1950 Liner. How cool is that?


Oh, my, I made it 2/3rds of the way around without finding anything wrong until that missing window. I know it is a complicated repair, but common Chris, cover that hole with some plastic.


Now those are some wicked cool Herh windows. They sit flush with the frame. On a scale of 1-10 I call this old girl an ELEVEN. The interior is almost perfect too.


These two ladies are my clients trailer. They are spoken for, but the rest of what you are about to see is looking for a new home.


Not that one...


Usually when I go over to the Eastern Shore I go the most direct route to get there. Coming back I take all back roads. I take it slow for this is SlowMarva. I do not take the back roads to avoid the law, I am on the hunt.


and usually, I find something interesting. A 68 Scotty Gaucho anyone? Too far gone and not early enough to be worth the cost of restoration. Pass..


Not sure what this is. The briars are leafing out and their canes are very stiff right now being swollen with water. I just could not get in close enough to identify it. The man who owns this is a hoarder. There was junk all over the place. I spent a good while visiting but anything he had was never going to leave his property.


I got to go over the Francis Scott Key bridge also on my way to the Port. This is another beautiful bridge. Unfortunately, this bridge does not have it's own color. It is just bridge green.


In and out of the Port with no issues today. I was kind of disappointed. I have come to expect huge hassles from the Longshoremen and got nothing but friendly attitude. No requests to search my truck or waiting on Union breaks to come to an end. I was even told to have a nice day as I left through the main gate.

Monday, April 4, 2011

Carpet Call


I got an email today pointing out the lack of posts to this blog. Tom, I am sorry, I have been a slacker when it comes to this blog. We have been very busy at the Works though. I think some of you might like to see exactly what has happen since my last post.
P.S. Tom, thanks for the nudge...


The build out has begun. It is hard to see in the photo but a pan was fabricated to cover the entire bathroom area. Any falling water will go in the drain and no where else. There is a piece of plywood in the bottom of the pan to protect it while we walk in and out. The curb is also got a strip cover it while we walked in and out. We walked in and out literally 100's of times as you will soon see.


The side walls of the shower follow the curves of the trailer. How to get that curve perfect? Make a template. I used rips of luan and broke the curve into sections. I carefully scribe each section and joined them together...


then add in a vertical element perpendicular to the floor. I now have a perfect template of the entire wall. From this template I can make the actual panel that goes in this location. I can also make the aluminum panel that will face the interior wall of the bathroom and the maple panel that will face the salon.


Do you see how this works? I have the wall perfectly copied. Slick right? To make this template, it took about 150 trips to a bandsaw, jig saw, or belt sander. Once the copy is made, it only takes about 15 trips in and out to get a perfect fit.


This is not a good fit. A little scribing and a little belt sand...


until it is all gone. No gap, tight fit. This kind of attention to detail is what separates the boys from the men. Not to float my boat, but this kind of skill has taken me over 18 years to learn. Scribing is not an easy thing to learn and every time I do it, I feel challenged. I live for a good challenge.


And there you have it; the inner wall section. Next step is to cut out the inner aluminum then the outer wall section. Then to move on to the next wall and repeat. The template had to next be scribed to that location. Not one bulkhead is the same as the next. Each and every time, I had to reshape the curve before cutting out actual pieces.


Here you see some of the fir strips that stiffen the wall and act as studs. This has not been attached tight to the floor and wall and that is why you see light at the top. When in place, the gap is gone.


The same principle was used all the way around the trailer. You may notice the water tanks are sitting in place. The cabinets will be built around them.


This will be the refrigerator cabinet. It is a single panel of maple with fir supports on the inside face. A solid maple face frame will be fabricated once all the bases are made.


The space here is a comfortable 32 inches wide. I was concerned about constricting the view, but instead the eye is drawn into the space between the cabinets. A room divider will be utilized to make the front a private space when needed.


Hope you liked this little update. I have been working some other projects through the shop during the past few weeks also. I am not going to bore anyone with photos of axle swaps or replacing a refrigerator. I know some would enjoy it, but I will save it for some other time.