Two posts ago I was telling you about the 1967 Overlander in for structural repairs. I want to continue with that project in this post.
To kick things off, I feel the need to say there are a lot of aspects of these projects people never ever notice. A lot of thought and effort goes into these structural and systems repairs/ improvements. Most tend to only see the furnishings and never consider what is holding it all up. Many hours go completely unseen or even thought about.

As with most projects, there is always more than meets the eye initially. Once the the floor came up, it became painfully obvious that the pan that holds the black tank was completely shot. These were originally made of galvanized steel. More than 40% of this pan was rusted away. The closet flange and vent pipes were what was keeping the tank from crashing to the ground. The tank itself was cracked around the inlet and the vent. I wondering why this tank did not fall out on the road. The pan was easy enough to replicate out of 14 gauge aluminum.

The tank was not as easy. I looked into replacing it but 1967 is a grey year for manufactures. The inlet location and vent locations are unique to this year so the tanks are just not available for replacement. I missed it by one year. You can see the spiral crack going 70% of the way around the 3" inlet. The vent outlet was cracked all the way around. Some threads of plastic were keeping it from falling off. My only option was to repair the tank. Here you see it after multiple bleach baths.

After consulting with a professional plastics guy, the cracks were welded shut and the top was reinforced with roving and epoxy. A new valve had to be installed. Above you see it sitting where it will eventually live. You also can see the grey water tank that was installed just behind the rear axle. Grey water tanks did not begin to be utilized for many years after this trailer was built. Holding back the grey water is a modern essential.

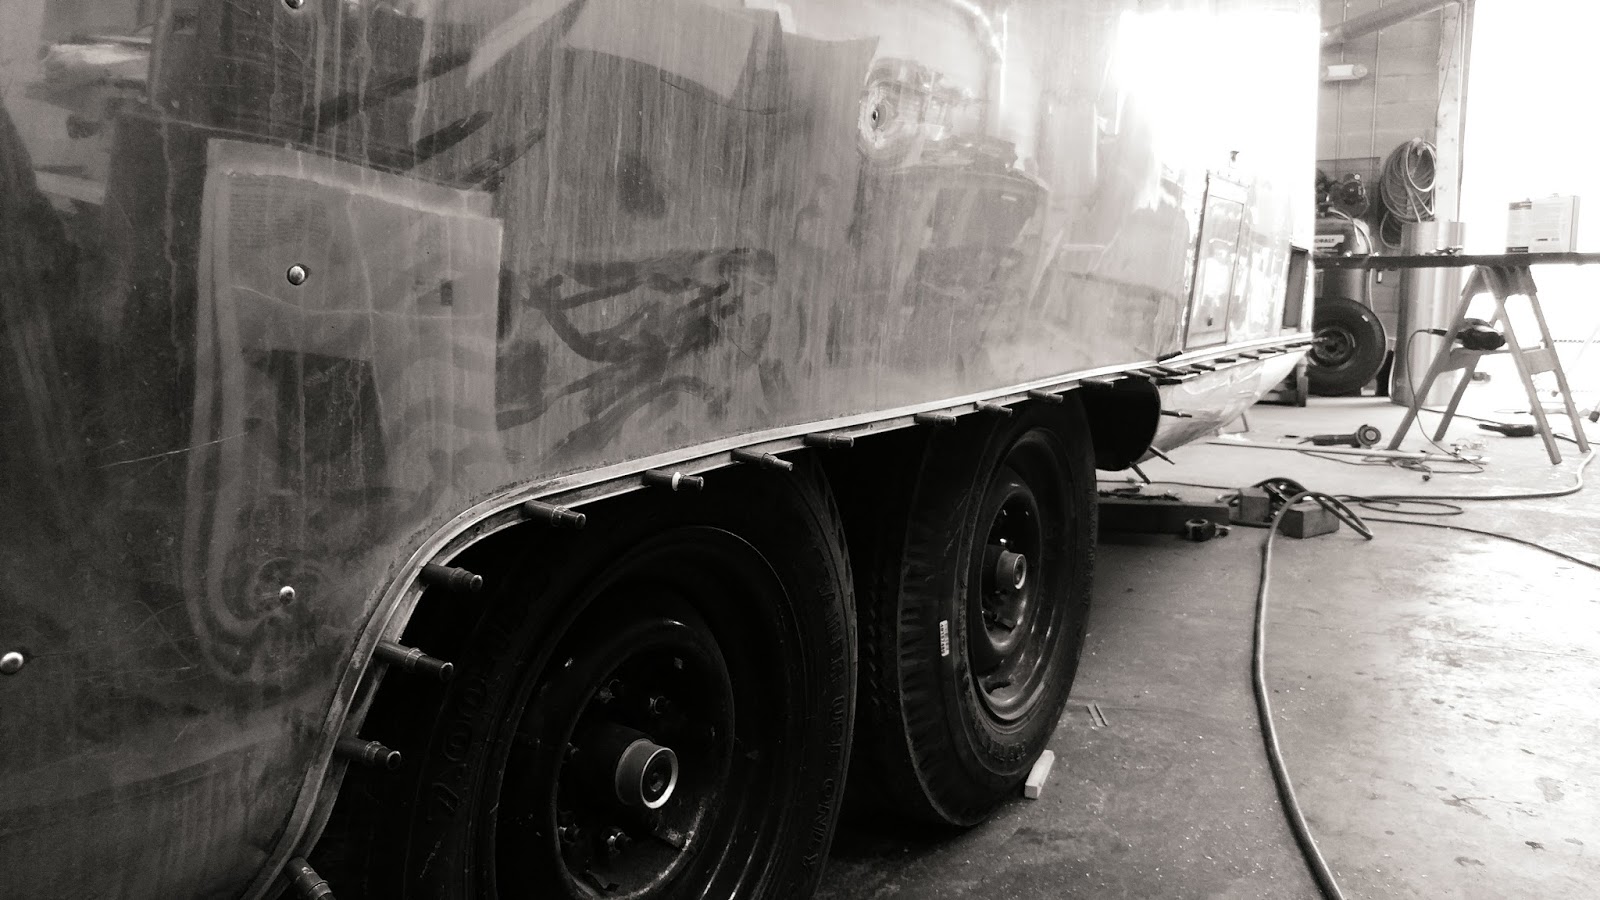
The wheel wells on this trailer were toast. The bottom inch all the way around each one was completely gone. Occasionally this damage is limited and a repair can be made, in this case new ones were fabricated using 11 gauge aluminum.

Once the frame was all straightened back out, the black tank repaired, the new grey tank installed, the new floor put down, the wheel wells installed, an umbilical cord installed into terminal box with the brakes wired up, the new belly pan installed, then, and only then, it became time to lower the shell back onto the chassis.

My attentions next turned to making the shell sound again and water tight. There are a lot of steps to complete. My focus turned to fixing the damage to the shell. Numerous times this trailer has been hit and repaired. There is evidence that it was struck on both sides and two different end segments. None of these repairs were executed properly. They were all done by going from the outside.
The photo above is damage that was covered up with a flat panel. It is difficult to see but both ribs were pushed inward.

In the rear there was this rather large hole that had been patched over.

They used a cedar shake to keep the skin from caving back in. The aluminum used to make the repair in this area was roofing flashing.

I installed a salvaged baggage door. The hole goes away and suddenly there is easy access to the shower p-trap. This looks 100% intentional and original.

You can see the rather wide gap between the skin and the bent rib. Please note the extensive scrapes to the skin. The entire panel had these down the side. They even went over portions of the door skin.

These are very difficult to fix. I have to utilize hydraulic pressure to fix this stuff.

This entire side was hit or perhaps it was the trailer that was dragged against something harder than aluminum. There are creases running the entire 12 feet of this panel. Two photos ago showed these creases from the inside. This entire panel was replaced.

I won't bore you, but panel comes off. A copy is made in new alclad aluminum...

... the new panel is then riveted into place.

This post would not be a normal one if I did not rant just a little;
Above you see one reason my shop will always be repairing rotten floor. That is an Olympic style of rivet. They are approved for Airstream body repairs. Some shops even claim they are approved for structural repairs. These rivets allowed someone to replace a good deal of aluminum without bucking a single rivet. All the work can be done from the outside. Most often the technique used is to overlay the damage with a new panel then to olympic the panel back on. These rivets get shaved down with a special tool. From 5 feet they appear to be real, bucked rivets. When done, the customer leaves loving how good it all looks. Shortly after, the center of the rivet begins to wiggle. The mandrel eventually starts to work itself out and the rivet begins leaking. Within a short time the floor starts to weaken and a shop like mine gets contacted.
We replaced every single one with a bucked rivet. There were at least 500 of these olympic style rivets removed and replaced.

We replaced every single one with a bucked rivet. There were at least 500 of these olympic style rivets removed and replaced.

Damage like this is just left in place and a new skin covers it all. From the outside it all looks fine but under neath is a damaged structure.

A repair done correctly.

The front panel had a spare tire mount screwed to it. The dissimilar metals destroyed this panel. It too was replaced with new alclad.

Doesn't that look a whole lot better?

Starting in 1964Airstream used these banana wraps in the front corners. On this trailer someone had filled the dents numerous times with bondo and primer to be topped with some sort of silver-ish paint. I stripped the paint and bondo, then removed all the dents using my beloved shot bag and dolly.

Dolly, hammer, shot bag, patience....
The original trim goes one once all of the shell has been riveted back to the c channel.


The cabin door has proven to be a serious challenge. For added security someone installed a pad lock hasp. Big, honking screws were used to mount it. Someone still tried to use a crow bar to enter. I think of all the jobs I have looked at or done over the years, a hasp is a guarantee of attempted entry using a crowbar. When this trailer pulled into my yard the door would not latch or stayed closed. The floor below it was completely rotted away. It now opens and closes. It even locks shut. It is far from perfect and will require a little more attention.

As stated, the door closes less than stellar. Here you see some of that damage I mentioned earlier. Once aluminum is creased it becomes very difficult to bend it back.

Here you can see how a previous owner adjusted for the door not working properly. I see so much of this stuff.

This is something that cannot be so easily fixed. New lights were added. Someone thought a wire wheel to be the perfect solution for getting off the old sealant. Unfortunately those scratches can never be polished out. The hole was not in the right place so a dremel was used to widen the hole. Thankfully the marker lights cover most of this. Unfortunately, it does not cover all of it. I always hope they thought they were doing the right thing.

Someone also thought they were doing the right thing by making rain gutters. They too were fabricated using flashing aluminum. It is a shame they could not keep the gutters in a straight line. They slope down hill toward the front. An awning rail could cover this nicely if it were not for the fact it would visually accentuate the down hill run. Rain gutters are not really needed "IF' the windows are maintained.

Rain gutters were a Plan D, maybe even Plan E. They were put on to correct the inherently leaky 1966-68 windows. The windows need continuous diligence in making sure the window seals stay completely fresh. After just a few years they compress down and stop sealing. Instead of replacing the gasket a tube of sealant is pulled out and injected into the corners. It helps widen the gap, in turn increasing the leak. Over and over the attempt is made to fix the seal but never the correct way.
Work continues on towards completing a water tight shell. There are a vast number of holes to take care of. All of that will go unseen and be completely out of thought once the draperies go up.
