I am beginning to think there might be a Caravel gravitational pull emanating from FTW. Yet another Caravel has come to have some work done. Her owner brought her in for a new axle kind of knowing she needed a lot more. A ground up starts at the axle and goes from there so no lost work here.
She does need a lot more. She is a very original little lady. Just about all her original parts are still with her. 1968 has the wicked cool square tail light housings. I absolutely love the "Land Yacht" emblem on the back.
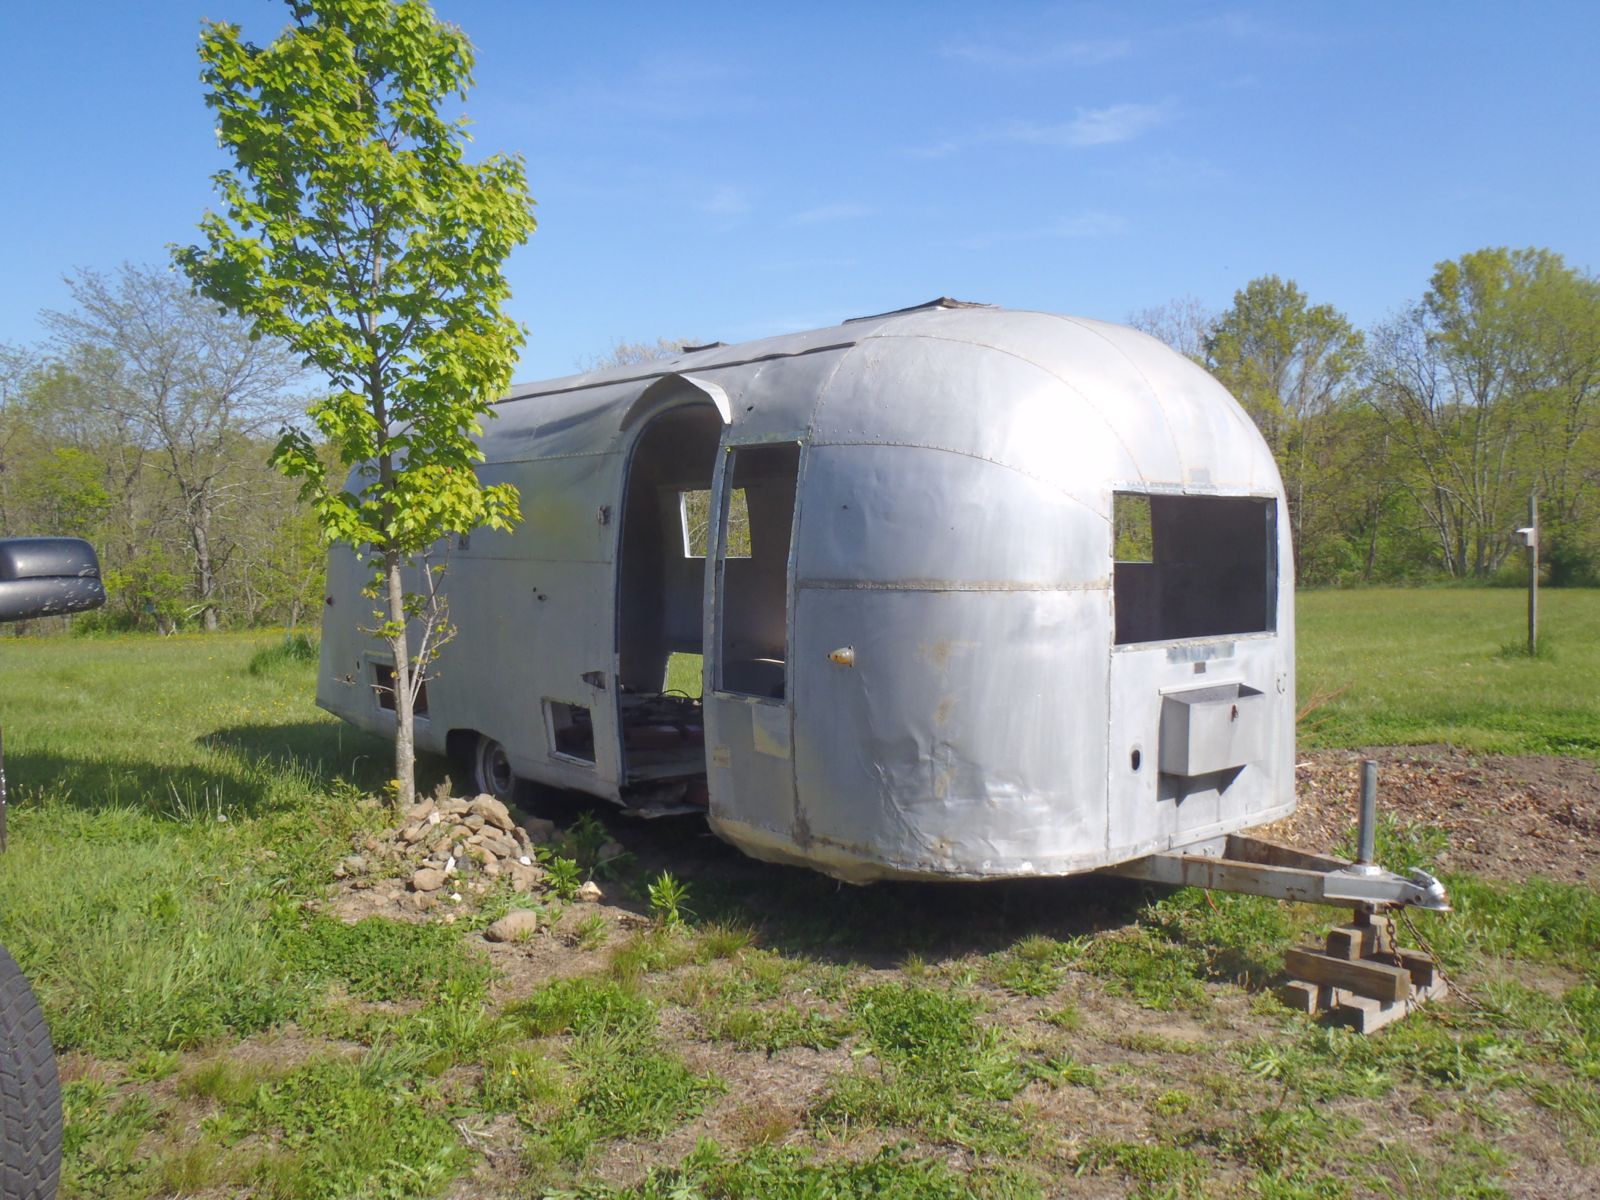
Unfortunately, her floor has been going bad for a lot of years. About 80% of the perimeter is gone. Yep, you see frame there on the right.
Her beauty sure is not gone. I have really come to love these compact but extremely efficient models. A perfect fit for one person or a couple. I am sure a close family can make a good go of it too.
A little beauty mark. I'll bet you a buck I make that go bye bye...
One more. I cannot make it go bye bye, but I can make it a lot harder to see.
I know you want to see inside. Sorry, you will have to wait.
I hope you will soon be seeing this trailer made brand new 1968 very soon.
You may have notice the original name badges in one of my previous posts,, masked off and primed. Here they are after being sprayed with the same obsidian blue the exposed frame and steps were painted with. They were also clear coated to protect the entire surface. A halo was created by wet sanding the letters before the clear and I love the way it makes each letter pop.
Absolutely stunning! I was very skeptical (even though I made an attempt not to show it) when Michael suggested we do this. I am so glad I said yes to do it this way. I am very happy with the results. It does not look like everyone else's now. Subtle, but dramatic.
Something I talked Michael into was replacing his old black water tank instead of repairing the damage the original had. In hindsight, I should have just repaired it. It would have been cheaper.
He bought what was billed as an exact replacement. It was far from an exact replacement. I was told that it came with the outlet installed, but the inlet and vent were loose so it could be placed where the year required. The same tank was used 1964- 1969 but the inlet and vent locations varied. I was told it was easy enough to glass those on where needed. The tank came without said inlet and vent. When I called Southern California to ask where the inlet and vent were, I was told they were a separate purchase. That was not what I was told when I inquired into the tank. At over $600 with shipping, we decided that we were not spending any more money with that vendor. I obtained what was needed locally and made the installation of the needed inlet and vent connection. It was easy enough to glass them on using roving and fiberglass resin. The tank also had a rather wide flange all the way around it. This flange had to be trimmed to make it fit into the new stainless steel pan we had fabricated at Metal Benders, a neighboring shop. That pan, was an EXACT match. They do excellent work including aluminum welding. Tom and his crew are first class craftsman and I cannot recommend them more. Before bolting the tank in, Michael suggested we leak test it. It was a very prudent suggestion.
DRIP, DRIP, DRIP...
... more DRIP, DRIP. SORRY FOLK, but WTF!!!!!
See that gap right in the middle of the mirror? There were gaps all the way around the mounting flange.
This flange was the one thing installed by the manufacturer. Did I mention this tank cost $600 with shipping? I honestly feel used. When I called to talk about it, I was promptly pushed off to Area 63 Productions being told "We no longer do service". I didn't ask for service, I asked for satisfaction. As I said, no more money is being spent in Southern California. Uwe at Area 63 and I are very familiar with each other and he was shocked they sent me to him. He scratched his head also to a solution. I spend a good portion of my day finding solutions and I came up with a great one.
I have become a huge believer in this product. Well not this product, but the Rustolium version of it. It really is a miracle product. It does wonders on interior seams, joints, and rivet tails. It sucks tight into the joints and seals it all the way.
I masked off the valve mounting plate and carefully sprayed the gap between the plate and the tank. I feel as though this solution stopped the leak, but went one step further.
Since the water was exiting from the screw holes, I first mounted the valve by filling the threads of the screws with a 3M sealant designed for plastic body panel seams. I then backed the screws out one by one and injected the same sealant into the hole until no more would come out. As the screw was reinserted, copious amounts of sealant came out. I figure any void between the plate and the tank was filled also. The tank was allowed to cure 24 hours and then filled with water. No more leak! I feel sorry for the guy who has to service the valve in the future.
We took the time to insulate the pan before the tank was bolted into place for good.
Next we went on to installing the new belly pan discussed earlier.
The belly sheet is 23+ feet long so we really needed about 24 pair of hands. Every jack, jack stand, and lift I had was utilized to hold the sheet up. I might not have a rotisserie, but I know how to get it done. Like I said, my day involves a lot of coming up with solutions to problems. "There are no problems, only solutions." Who said that?
Surprisingly, the easiest part was what is usually the hardest, the rear. It went right into place like it was made for it. Hold on, everything I do is made for it.
Next, we moved on to the water heater opening. As shown in the previous photo, it was a big hole. The objective was to fill it back in, but also create the proper opening for the new RV 500 on demand water heater.
I know it looks like a lot of cleckos, but honestly, we never saw the bottom of clecko bin.
All set for the buck rivets.
All bucked into place.
Something I want to share with you all is how hand built these trailers are. I don't know what year they implemented line bore machines, but in this era, they did it truly by eye and hand. Notice 1 1/2" between rivets. Carpenters always start on 10 when measuring. I can't help but use my original training when it comes to measuring.
Whoa! 2"? What the heck? Why is one slightly higher too? Hand made Jack!
In previous posts I have said how the first place the eye goes is the eyebrow above the door. The second place it goes is the wheel wells. Money well spent is replacing the torn up edging around the wheel wells. I won't tell you how to fit it, but maybe you can figure it out...
It is kind of tricky. Bring your trailer to me and I will make it look all new again.
It was a day of body work. That means a few things; dramatic transformations using metal, a great deal of sweat, and certain amounts of blood. Photos of the work are soon to follow.
I have a very unusual project coming up. As many of you have gleaned, we are all about breathing new life in these old girls. The main goal is to get them back on the road, however, sometimes the road is no longer an option. The priority then becomes making sure any good parts are harvested so other trailers can make it back. You might note that every single piece of aluminum is damaged beyond reuse. She just has nothing left to give. The very last option is taking them to the recycler. An Airstream pays far less in scrap metal than most people think. Someone once told me there is $2500 in scrap. In reality there is about $800 worth, IF, you spend 50 hours to separate it all out and get top dollar for it. Take a trailer in, with a title, and they give you $300. Short of selling it for scrap, this trailer is going to get an entirely new lease on life. It will soon become a chicken house. Yes, a chicken house. I have a vested interest in this project because Michael has been a close friend for almost 30 years and half the flock will be mine. Stay tuned for this unique and unusual project.