Sunday, April 17, 2016

1967 Overlander


I have launched right into a major structural restoration. This old Overlander is in need of a serious tune up. 


At this stage of the project, I knew all the floor need to be replaced. I did not know how badly. If you own a 1966-1968 Airstream, you too have all of these same issues. It is not your fault. It is Airstream's fault. They did not intend to build something that would leak so badly, the times were changing and so was the attention to quality all across America. I guess it really is their fault.


Just about every corner has very soft or completely rotten floor. You can never see many of these spots due to the bathroom module. 


The galvanized wheel tubs seem to always give out in this location, allowing water to rot the plywood edges.


The refrigerator vent always leaks allowing in rain water. A replacement hatch done improperly just adds to the leak effect.


The water tank and gaucho hide what is going on up here.


Plumbing stacks, hatches, windows, roof vents... they all were serious culprits in this era. They all leak badly in this era.


Big honking screws used to attach various things that should not have,  allow water in. These are actually the biggest I have extracted yet. 


Holes, holes holes. Not one of those you see is supposed to be there.


This is caused by steel and aluminum making contact for years. The aluminum atoms do not like being near the steel molecules. The aluminum atoms do everything in their power to get away from the steel molecules.  You can put your finger right through the skin here.


This is also a major bane of my existence. The dreaded Olympic rivet. The Olympic is Airstream approved, for panel replacement.  By doing the repair from the outside, they substitute the solid rivet. This technique  provides a speed and ease for panel replacement. They are complete garbage. They leak like crazy and over time the mandrel in the center begins to move outward. 


When the plywood subfloor comes off it never looks pretty. Sometimes it looks very scary. BTW, this entire frame is 1/8" formed steel. My steel working friend is shocked by this. To quote him, "thats all it is? Seriously? how do these Airstreams even last so long?"


Honestly, I was kind of surprised how much metal had completely rotted away.


Remember that leaking plumbing stack I mentioned.


It did not look so bad with the floor still on.


Unfortunately that leak ate up the entire out rigger and part of the main frame rail.


Remember that patch of floor missing by the door? That leak was from the bad door seals, leaking access hatch, and refrigerator vent all letting water in...


This area is really bad. 6 outriggers are toast, two of which are stair slotted. The main frame rail is also completely compromised here. The entire frame sags 1 1/4" in this location. 


All is not lost. I have the means to repair it all. 


I simply cut all the bad metal out. Yes, it really is that simple. This pile is just the beginning. It would grow three times this.


I will caution you however that once you start cutting, things will begin to move. It is imperative that you keep them where they belong. Sometimes you even will need to persuade them back to where they used to be.


I simply cut the cancer out and replaced it all with new metal.


New metal was formed to the exact same shapes and dimensions as the originals. Piece by piece the parts are mended back together.


New outrigger. Yeah, I just make them myself.


And the slotted stair units I make those too.  I use a laser to make the perfect slot.


The stair units are currently unavailable though various suppliers. I was told that the consistency of the slot has been an issue for years. People were buying a left to find it different from a right hand one. Because of this problem, my main supplier of frame parts has stopped stocking them entirely. FTW has solved this issue by now selling them as a pair. Soon, very soon, you will be able to buy these directly from me. Made in the USA, from American steel, fabricated by American craftsmen.

As the frame goes into it's next stage I will be sure to post more photos. Feel free to post any questions below in the comments section.


Did I mention that this guy loves to weld?


Thursday, March 31, 2016

A Great Hack


I really do need to get more regular on posting. My apologies. 


Currently I am working on a 1967 Overlander. It has some very unusual tail lights. In all honesty they kind of have me puzzled because in 1967, Airstream was using an entire taillight assembly, pictured above. The assembly is a boxy affair and not very aesthetically pleasing(in my opinion). These assemblies are also really bad leakers.


The Airstream I am working on has an AutoLamp system on it. Here is where it gets very odd, Airstream did not use AutoLamp. As late as 1966 they used the Bargeman 99, but only on the Caravel. By 1967 all models had the boxy tail lights I showed you earlier. Why the anomaly? I wish I knew. These AutoLamp taillights are no longer made. You can still buy reproduction lenses but not the bases. As most things made of stamped steel they tend to rot out over time. AutoLamp was commonly used on mobile homes and house trailer that were not really moved too much. 


This is what I found under the lens. It may not seem odd at first glance but it is actually a very clever hack. This hack was so well done that I did not pick up on it at first glance. When I did notice, my thought was 'Nice hack!!! Well played'


Someone took a Bargmann 99 reproduction base, similar to this original and they cut off the outer lip. Then mounted it onto an original AutoLamp base. 


The craftsmanship used to adapt the new base to the old is simply brilliant.
Well played.

Tuesday, October 6, 2015

The Winter Palace

I do not usually work on trailers from the 80's. There was something about the sound of 'in need of an extreme makeover' and 'something completely different' that appealed to me. 


She is a really big girl this 1984 Avion. 10.6 meters. That translates to 34.77 feet. I do not know the weight, but it is way up there. This Avion is an Abrams tank on three axles. It cannot be polished, that is a big plus.


Come on in... 
Be careful though, 1984 really wants it's vibe back. 
I graduated high school in 1984. 
It was a very awkward period in America. 


This rather awkward flooring was installed very recently. It is all going away.


Do you think I am joking? Just look at that fabric...
In all honesty, it really is one, seriously comfortable couch. It pulls out to make a queen sized bed. Pretend...
...you do not sleep well one night... 
...you get 3 hours of sleep and by 10am you are spent. 
You clock out.
That couch might be a very good place to take a little nap.


This trailer is very spacious. There is a very nice dinette to have the morning coffee while reading the online news paper. An almost full sized refrigerator makes full time living very easy. The one you see is a 110volt only and it is going to be replaced by a propane/ AC version.


The full time, rear, walk around queen sized bed is a nice luxury. It is a bedroom suite. 


The various room dividers are made of solid wood. I think most Airstreams are some cloth or plastic version.


They all recess into the wall so you do not see them. 


These two dividers create a private dressing room just outside the bathroom. 


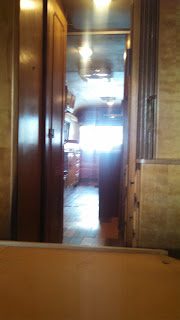
Looking forward from the bedroom suite. Bathroom is on the left. 


A generous shower/ tub unit.


Take it all in. Soon it will look completely different.


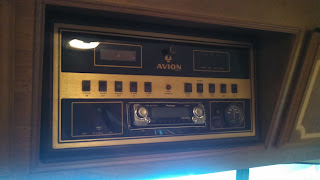
The command central all works. It has an AM/FM stereo. I was hoping for 8 track. I do not want to miss quote the tank statistics, but all three tanks are huge. This girl can go for a long time between fill ups or dumps.


Not everything is an aesthetic change. There is a little of this and that to fix. 


This AC was installed fairly recently. I suspect it was put on by the RV dealer in Ohio that middle manned this sale. It is fairly small for such a long trailer and is not installed correctly. When it rains, it literally pours right through. 


The roof seams have been gone over a few times with various things. More slop put down on top of leaking slop. 


I guess I could slather something up there like everyone else would. 


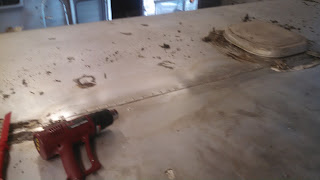
I could also remove it all and seal the seams correctly. It all starts with a heat gun and a nylon chisel.


Then some lacquer thinner on a cotton rag motivated by serious helpings of elbow grease. Repeat. Repeat again. 


Eventually, with enough determination, you end up with this.


All three roof vents were removed. The half closest to you has been hit with the heat gun and nylon chisel. The upper half was wiped with the cotton rag and lacquer thinner. 


Liberal helpings of elbow grease. Liberal. I love that word. Halfway readers now have elevated blood pressure. But liberal amounts of elbow grease get this job done. 
Take a deep breath.


Tuesday, September 29, 2015

How to Skin a Cat


I have been polishing. Many people love a polished Airstream. Many people have a lot of opinions on how to achieve it. This is just one way. It works for me. I really do not want to debate other techniques or tooling.


I find, the most efficient method is to use the tools that work best for you. About 10 hours into holding the tool a little light bulb will go off, you will have an epiphany, and suddenly you will understand how to make the tool do what you need it to. 


Results always vary. One panel will polish perfect, the next will try everything in it's power to resist the effects of the polisher. Dents you never knew existed will suddenly appear. Scratches will show up like neon lights on a flat Texas horizon. 


Many try for that perfect mirror finish. It is rather difficult to achieve. I find this reflectivity from 10 feet to be more than acceptable. a 10 at 10 is always my goal.
Some readers(Tom) may note I have gone back to my high end Canon pocket camera. 

So, how do I get to this polished state? I will show you everything. Over the years I have been sent a number of secret polishes to try out. Some have worked fairly well. I have never wanted to revel their names since things were not actually perfected. This time around however I am impressed enough with the polish to state exactly what it is...


On previous jobs I have relied heavily on the Jestco System. It is a sown cotton wheel and two rouge bars. Over the years I actually changed the system a bit. It uses a grey and red bar. I stopped using the grey and substituted the white. I find this combination works better. You can polish an entire trailer with this system. The problem however is it creates a lot of lines you notice. I now use this system to do detail work. It can cut in very tight areas. 


So this is the magic polish I used this time...
 It was sent to me by Vintage Trailer Supply to try out. I suspect they sent it out to numerous commercial guys to test drive. I am rather impressed with this polish. I used the No. 2(course) on a wool bonnet to do the first cut. The issue I have with wool bonnets is they create big circular swirls. These are a little harder to break up than the lines produced by the Jestco system. I find this Airbrite on the bonnet to be the fastest at removal of the heavy oxide. It just eats it up. I will caution you that you need the smallest of a dab. Too much is very easy to put on. It takes a long time to remove the glaze of too much of this polish. It is a bit greasier than the Nuvite polish it is looking to replace. I works better than Nuvite in my opinion.


After that first cut I switched tooling. I went over to the Cyclo Polisher. I used blue pads and the No.4(medium) polish for this round. Doing it over I would have done the yellow pads for the second pass, then switched to blue pads for the third pass.  This pass really brought out the shine. It actually is all that is needed for my tastes. I like it shiny but do not care for the mirror look. I spend more time seeing the imperfections than seeing the total glow of the aluminum when it is mirror polished. I did not stop here...


A final pass with the No.6(super fine) and white pads. 
So pads; I generally buy 4 boxes of each color for a job this size. That gives me 8 changes. I use the pad till it starts to get a little polish build on the surface. I then wash them out in hot water and citrus cleaner. They get rung out and left to dry. I will use that pad one more time before throwing it away. You need to know that the foam is part of the grit doing the polishing. When the surface starts to degrade, so does the quality of the surface you are going to achieve.


Almost as important as the polish and the tooling is the rags. You will blow through tons of rags removing the polish haze and residue around edges and rivets. I buy them in a 50 pound box. I bet we used 30 of those 50 pounds. You MUST use 100% cotton t shirt material. Some like micro fleece towels. I do not. I find the nap in the micro fleece has a tendency to catch grit and metal bits. It is very easy to scratch the skin due to this. I have found that 100% cotton T shirt material to be the best.  The rags at Home Depot and Lowes are not good quality. There will be knits and polyester mixed in. The rags will be irregular also. Go to an auto body supply house or to a high quality paint store for these rags. Ask for 100% cotton T shirt rags. Not wiping cloth, not staining cloth, 100% Cotton T shirt.
I will give you another hint; Fold the rag carefully. Each face will grab the black residue for only a very short period. Keep folding it over, exposing a new face. Just balling it up will result in a lot of wasted surface area. Maybe you do not care, it is just a rag. I care because quality rags cost about $1.50/ pound.


I will be glad to answer any questions you might have about what I have posted here. If you want to debate technique, method, or polish, please go to Airforums where people love to argue that stuff. I am just reporting on what I do. I look forward to your comments below.