Monday, June 2, 2014

Polish Time 1 of...

We have been trying out a new polishing system that came to us via the mail. The polish does not have a name yet. I vote for Shineola. I was asked to "test drive it".


In the condensed 45 second video above you will see what it takes to do the first step of this system. It starts with a custom cotton wheel and a white rouge made to the suppliers specification. The instructions told to me repeatedly, for every square foot you do, begins with a clean wheel.  Clean, raked, wheel was emphasized. Next a touch to the rouge bar then go at it. 30 seconds later, run the wheel through the rake and repeat. Repeat till done.


Monday, May 26, 2014

1968 Caravel, ELEVEN

She is done and will be handed back to her owner tomorrow. This has been a fabulous project to work on. A true ELEVEN in my book.


I find it good to reflect back on "before". I can still smell the mold, mouse droppings, and rotting plywood.


It has new trailer smell now.


One of the roof lockers was torn from the wall and just laying on the side gaucho.


It now hangs from the ceiling and even works like new again.


The refer had been removed. It was a good thing it was, since the floor under it probably wouldn't support the weight. Nothing in the galley was working. 


Now everything functions perfectly.


In front of the shower pan was an area of exceptionally soft floor. I literally stepped through, right to my knee one day. Most of the plywood under the shower pan was rotten also. The plumbing could not function if it tried. The fresh water system was full of holes, the grey water system was completely compromised. 


Not any longer. Jump in, take a shower...


Step over the big hole and gingerly step in to use the head? I  doubt that was going to happen. 


I wonder who will be the first to try out the virgin toilet.


This is a personalized FTW item. You need a switch for the water heater and pump, so why not make it easy to identify what you are turning on?


This Caravel did not have it's magazine rack. One was found in another trailer whose owner had added things he probably bought at a rally swap meet. They were period incorrect for a 1953 but the exact fit for 1968.


The reading light was broken. The socket popped apart and the wires worn through to bare copper. It now works like brand new. Mike worked some serious magic since these are very hard to find. He even got the brushed metal look back. 


A previous owner had made the side gaucho into a full time couch. We returned it to a gaucho situation again. It pulls out like it should again and makes a double bed.


Caravels have one drawer. That drawer is just a shallow plastic tray behind a fold down door. This Caravel has a large pull out drawer with dividers for utensils.


I hope you like what you see. I am very proud of this project.

Wednesday, May 21, 2014

1968 Caravel, Ten of ...


I know, I promised the next post would be the final post. It could be, because the Caravel is now 100% finished. I however could not end a project like this on the tenth post when it is a project taken to ELEVEN. So bare with me on my second to last post.


A major change to the appearance of the Caravel was loosing the 1970's aluminum Ford rims. They just did not look right to me.


As you can see they are very wide. Combined with the small tire size, they just looked odd.


The mags were replaced by powder coated steel rims. We kicked it up a notch by doing a double silver pinstripe on the flat of the rim. A nice reproduction set of baby moons from Vintage Trailer Supply tops it all off very nicely. Did I mention how much I love Carlisle tires? I do.


Perhaps as soon as tomorrow I will have a final post of the 1968 Caravel project. I am excited to show you some other things we have been doing at FTW.

Monday, April 28, 2014

Consumer Review (Public Service Announcement)


I am a firm believer in giving credit where credit is due.  I am a consumer just like many of you reading. I hope to alert the public about a serious, customer service issue so you can avoid wasting your time and money like I have.


If you are reading, you are aware that I have been working on restoring a 1968 Caravel. Some parts are very hard to find. Others are widely reproduced. Not all, are produced the same. Above you see the original lens for the over head lighting fixtures side by side with one of the reproductions. The company selling this reproduction charges $25.99 each and the shipping cost is astounding. They are exported from California so it must justify the extreme shipping and handling costs. 

In the description it says;  Ceiling Light Lens '67-'68(Triple thickness from original) These lenses are designed to fit over the base and are slightly taller than the original, this provides better heat disappation, a longer switch may be required


The new lens is significantly taller. 


This is how the switch protrudes from the original. There is exactly enough thread for the retaining nut and the knob covers it all giving a clean look.


On this one the switch is 1/4" below the reproduction when the base is laid inside the lens. It said in the description I would possibly have to replace the switch. Now go out and find a 4 way rotary switch, and spend an hour re wiring the fixture? This brings the actual cost of lens to around $125 each.


To make it even better, the base is actually 1/4" inside of the lens so you will need to get a switch 1/2" longer than the original one. 
I rejected these lenses and called the seller wanting to return them. I expected to get clipped with a 15% restocking fee but instead was told I could not return them. I had a similar experience with this seller before. That time I was told "too bad, make it work". First time, shame on you. The second time, shame on me. There will never* be a third chance to shame me. I will never* do business there again. A hard, costly lesson learned. If I cannot find the part I need some place else, I will declare it does not exist.

Next Reproduction


Above is the reproduction lens from Vintage Trailer Supply. It is virtually an exact copy. 

Here is the product description; We've had this inside light cover made for our customers with 1967-1971 Airstreams.  It is also used on early 1970s Streamlines.   Click on the MORE PHOTOS button to see if your light base is the same.

It measures 6-3/4" square and fits inside the edges of the base.

It is made of strong, heat-resistant Lexan® polycarbonate, rather than the original low-grade plastic which melted in the heat. It is the only replacement available that fits on the original base using your original rotary switch and requires no trimming or modifications.  It will make your fixture look brand new. 

You may want to drill vent holes in to match the original to further enhance ventilation to the fixture.

Please note we also carry switches for this fixture.


Cost pre lens; 19.95 each. Shipping and handling was very reasonable.


The only negative thing I can say is one corner of one lens was just a little short of the corner. If I were to ask to return it I know there would be no issues. I had an issue once with an item and they over nighted the replacement to me before I sent the rejected item back. Do not expect that every time, but that shows you the level of customer service dedication at Vintage Trailer Supply.

I hope this will help some of you in your reproduction parts searches.

* my Grandmother chastised me once for saying 'never'. I rarely use 'never' since it is finite.


68 Caravel 9 of...


FTW has a new employee. Mike Hanyi has come on board with a great deal of boat building experience. Airstreams are called land yachts so the transition is rather natural. Here, Mike is working on removing the old veneer from the hollow core doors. They all got re-skinned or remade.


We refurbished what we could and replaced wood as it was needed. There was a lot more replacing than refurbishing.


Some cabinets had to be totally rebuilt. Any guess of what wood species was used in this 1968 Caravel? We used it again in this 2014 rebuild. Hint, it is not commonly used today except for baseball bats.


After all the parts were rebuilt or refurbished, they were then stained with a custom color. Matching old wood and new wood is not an easy task. Good luck finding the difference in this trailer. Next, two coats of catalyzed sealer was applied followed by two coats of a catalyzed, low sheen lacquer. This finishing system is what is used in commercial bars. It is super durable. I always use low sheen finishes since they look more original and hide any imperfections. High gloss shows every single blemish and looks very out of place.


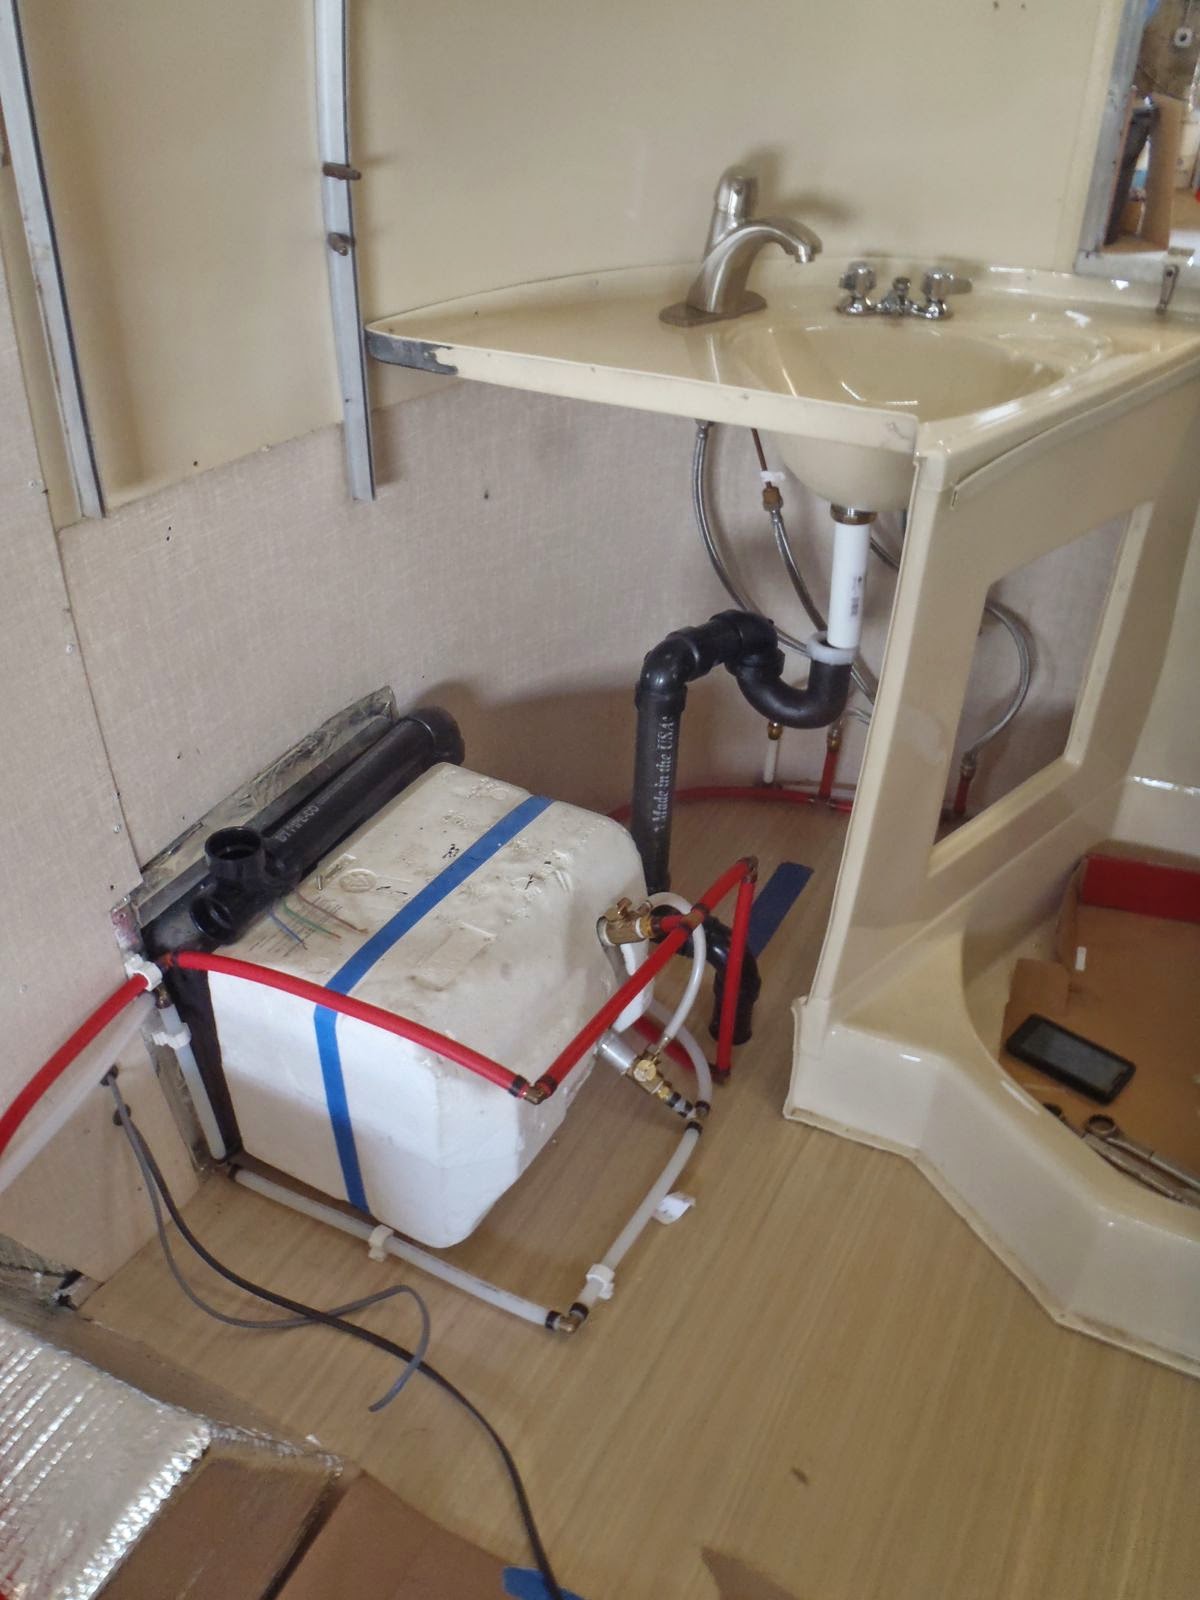
The bathroom module was the first thing Airstream installed, and so did we. Most of the plumbing was installed at this point, also. A great deal of plumbing is compacted into this corner, so doing as much before everything is installed makes things much easier.


We next snapped the pieces in, working from back to front. Since all the new furniture is an exact copy of the original, it all went right back where it was supposed to. Had a bunch of changes been made or imperfections corrected (what most people try to do) the job of putting it all back in would have been a serious challenge. Airstreams are handmade and Man makes a lot of imperfections.


That is a new Aqua Magic ceramic toilet. It was not planned, but the bone color matched the bathroom color perfectly. I am a huge fan of this brand and model as a replacement toilet. You might note that the wardrobe got an extra shelf. In a 17-foot trailer you can never have enough storage space.


Originally, both wardrobes had one shelf and a large hanging clothes area. The curbside wardrobe was converted to all shelves since today the need to hang clothes is not what it was back in the day.


As any one familiar with the Caravel knows, it has just one tiny drawer. This Caravel now has a large drawer with dividers for cutlery right under the stove. The original reefer units were very tiny. To get a new unit installed, the drawer always gets sacrificed. Not in this kitchen.  It got a bigger drawer.


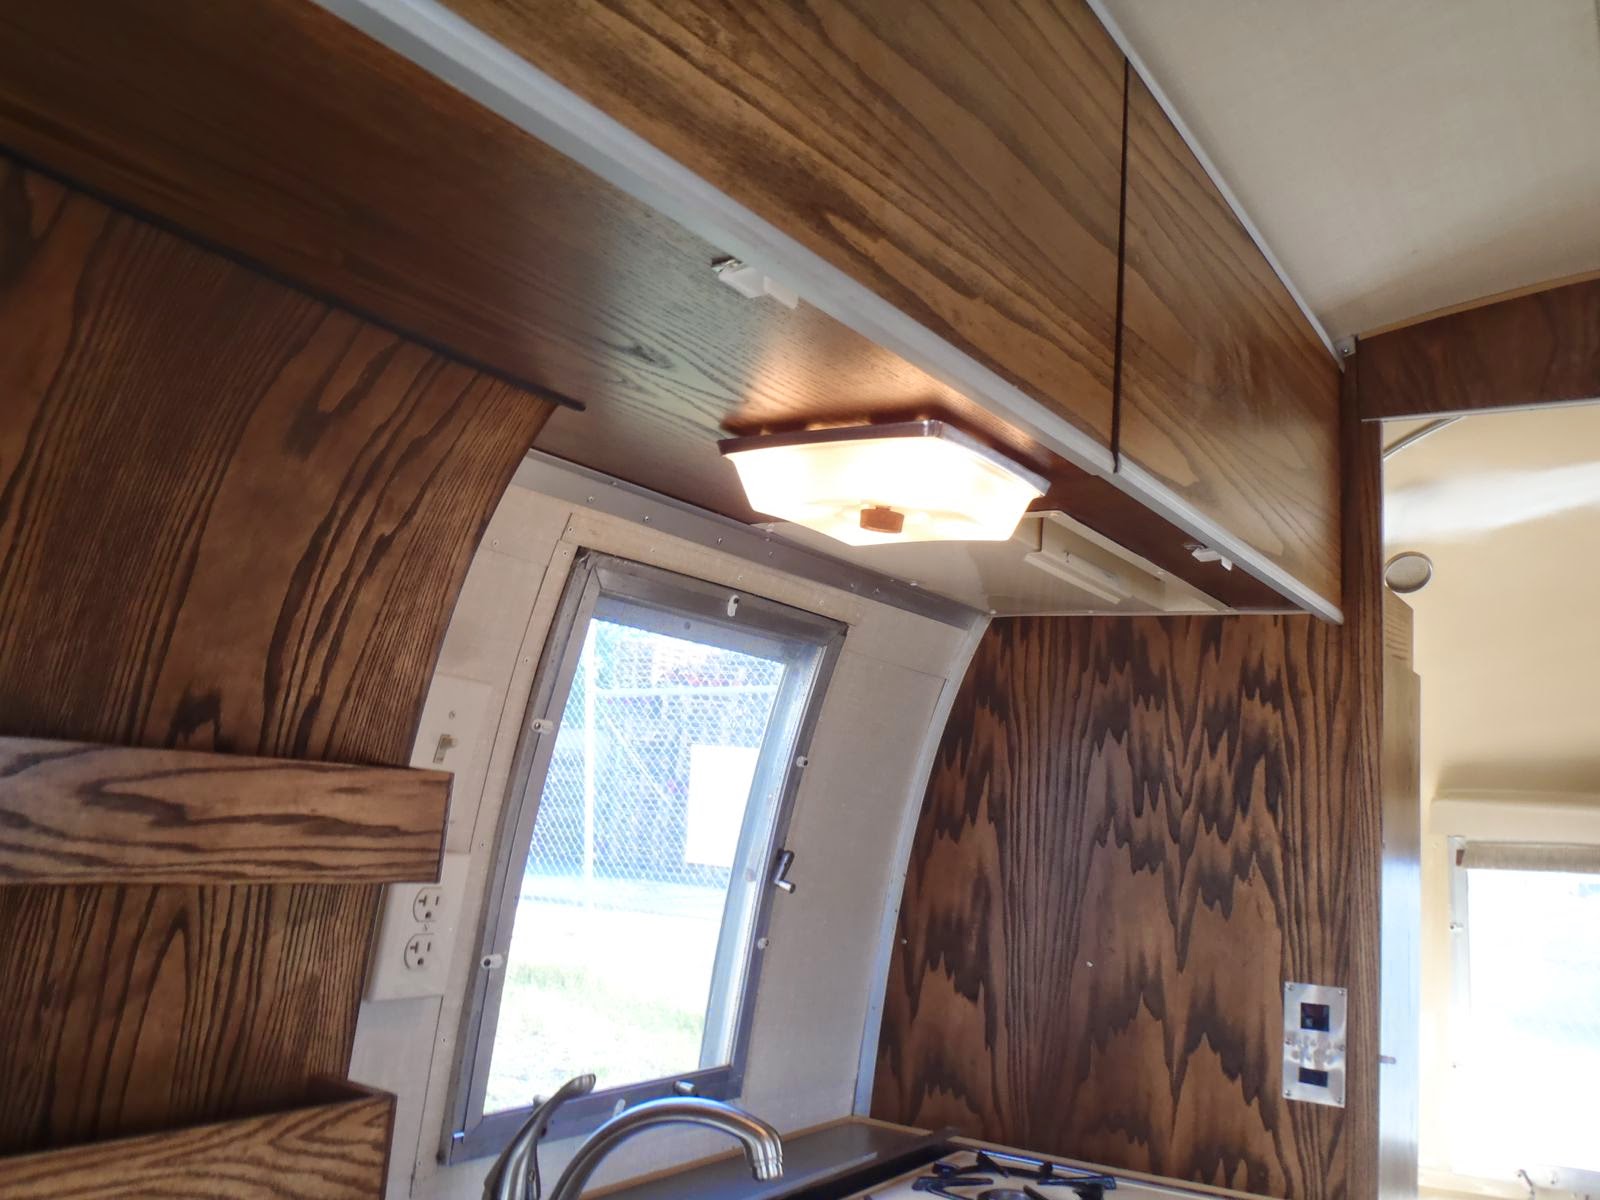
Here you get a good look of all the cabinets installed. 


You might be curious what the laser looking thing hanging in front of the end cap and down the edge of the back wardrobe is.  It is a LED ribbon light. Mike brought this innovation from his boat building.  You string it up during construction and remove it when complete. This is far superior to the halogen shop lights I used for years. Super bright, no bulbs to replace every other day, and no heat. I might use a halogen during the winter to help keep the trailer warm, however.


A modern distribution panel was installed under the side gaucho.  


(Sorry for the blur) Here is the distribution panel open. I really love this unit and you will probably see me using them a lot in the future. It contains both 110 volt AC and 12 volt DC fuses. The converter is integrated into this unit. The panel can easily be accessed through the side baggage compartment. Unlike the original system, it takes up none of the limited compartment space.


Please excuse the cardboard on the floor, but we put it down to protect the floors. Here you get an interior shot of the cabinets with all the fronts applied. You might also spot the sound system in the front cabinet. The owner wants to be able to listen to the ball game while sitting on the beach.


When the trailer arrived, the previous owner converted the side gaucho to a full time couch. We converted it back to a double bed gaucho.


Here you see the kitchen unit with all the fronts and the reefer installed. I fabricated a front using some salvaged 1953 aluminum and an original name badge from this trailer.  All the catches and latches were replaced with new reproduction parts.


Many people are very into that 'retro look.' Unfortunately, retro means boomerang to most. I hate boomerang. I see it as a cliche of a cliche.  Above is "retro" to me. This is a Nevamar line that many of my previous clients will easily recognize, since they have one of the 9 colors it comes in. This laminate is both modern and classic at the same time. It is called Serene Stardom. Both the counter top and dinette top will be surfaced in this material. Between the floor color, bathroom color, counter top color, wood color, and fabric colors, a rich inviting feel will be created. I look forward to showing you all of them together.


So that is a wrap for this 9th post. My next post of this trailer will be its final. In the next couple of days it will be totally complete except for the upholstery work. Stay tuned in….

PS.  The wood is ash.

Sunday, February 23, 2014

68 Caravel, 8 of...

It has been a while since I posted. I must apologize. I did take a 10 day trip to Florida, but my nose has been to the grind stone none the less. In this post, I will just focus on the Caravel project. A few other jobs have snuck through the shop, but those will be later posts. 


Insulation went in. I use a reflective type insulation. The results of two layers of this insulation has been rather dramatic. One layer goes against the exterior skin and one layer is against the interior skin. Above you see the end caps after they were covered with the insulation.


Here the first layer has been applied. Wiring comes next after this step, followed by another layer of insulation. After all of this, the end caps are put back in followed by all of the skins. You might notice I am describing fast. That is because I lack photos to show you all of this stuff. Some days I just forget to pick up the camera.


With all the interior pre wired and the skins all re installed, the focus shifted to the floor covering. Fortunately for me, the flooring company I share a fire wall with, now does Marmolium sheet goods. The boys came over and did their magic. It is rather unusual to have someone else working on my project in my shop. I just cannot do it all and now Forbo( the manufacturer of Marmolium) will only sell it to certified flooring companies. The process began with all the bolt holes being filled with an epoxy filler. Once set, they were scraped flush and sanded level. The next day, Brandon(in the front) and Ben(with his back to you) began fitting the sheet to the contours of the trailer. Two other guys from next door hung out and watched while Brandon and Ben did all the work. I watched too. Watching others work is a rare luxury for me.


The sheet comes 6' 6" wide, so a piece needed to be welded on to the sheet. The welding actually takes place after it is installed. The welded seam will be entirely under cabinets so it will never actually be seen.


Once fitted, the sheet is rolled up and an epoxy adhesive is applied. This type of adhesive is a big bonus. Not only does it hold the floor covering down, it makes the plywood water proof. Some of this epoxy adhesive fell on the shop floor. It pulled up the concrete when I took it up. 


The sheet was then rolled down into place. A heavy steel roller was used. I wish I had taken a photo of it. It was medieval looking.


Perfect fit!