The Toaster has been the one and only focus in the shop for the past few weeks. By this coming weekend, she will be completely finished and we are looking forward to handing her back to her stewards. I thought I would give you all a taste of some of the things we have been working on.
The entire interior has been restored. This meant either refinishing the existing furniture or rebuilding the furniture like new. In the case of the sink/stove base, it meant a total rebuild.
The counter top over the refrigerator had a very unusual dark spot on the underside. I thought it very odd to see what looked like water damage on the underside of an area that never sees water. Then something moved...
... and out came a carpenter ant. Thankfully, they only made use of the counter top and were not eating away at other areas. Since the counter top was getting rebuilt with new laminate, it was no big deal. I eliminated the carpenter ants, of course.
The Toaster came to us mostly taken apart. Unfortunately, it came without any deconstruction photos. Only one Ziplock baggie was labeled. It read, "stove connection" and contained one screw and a pipe clamp. We sorted it all out and figured it out. Both Wayne and I love jigsaw puzzles. Three dimensional ones are really fun.
There were a number of things missing from the puzzle, too. This bulk head wall was one of them, so we first made a template of the wall.
Then, a final version could be made from oak plywood, removing virtually any chance of making a mistake with the saw on an expensive piece of wood.
We had all the light fixtures to deal with. Some of the fixtures were painted, as was this overhead light. It's made of aluminum and polished up like a mirror. On the International models all the fixtures are dual voltage. Care was taken to document how everything was wired before they were all taken apart to be made new again.
Those fixtures not coated in paint were rusted fairly badly. They look like brass at a glance, but they are really just sheet metal that was nickel coated. The nickel then was sprayed with a tinted lacquer.
Every part was glass beaded to remove all the paint and rust. My favorite, PPG K36 primer was used for its incredible filling properties. We then shot the parts with a brass paint and topped them with a dull lacquer finish. They are not as clear a brass color as the tinted white metal was, but they look 11,000% better than before. If I could find a source for all new plastic lenses they would be absolutely perfect.
They were epoxied into the holes....
... then sanded flush. There is now zero movement in this area. It is a shame you will never see this kind of fix. I think it looks beautiful!
Here are the new countertops for the bathroom. The laminate, Formica 'Surf', very closely matches the original blue used in these units.
It was also used on the shower wall that we fabricated. I really like the feel this blue gives. I am 100% certain you will be seeing this laminate used again.
Originally, a gaucho was used up front. The owners really wanted a dinette. "We make dreams a reality" is our slogan.
Here it is with the table in place...
... and here it is with the table lowered as it will be for converting to a double bed.
The original sink was reused in the new countertop.
An all new countertop above the refrigerator. We reused the grill work but did not reuse the carpenter ants.
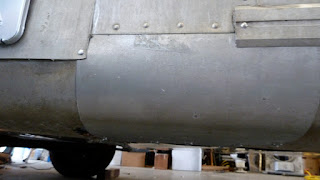
The Toaster has had a few tire failures over the past 51 years. These blow-outs have really torn up the wheel wells. Since the eye always goes right to the wheel well, we made the effort to fix the damage here.
We save the skins from panel replacements for just these situations where new patches would really stick out. The match is rather good, if you ask me.
We go from all torn up...
... to fairly original.
The gas lines were made new again, too. A little hint folks: if you disconnect a gas line, cap it off or put tape over the end. By taking a few seconds to do this you will save a few hours of taking EVERYTHING apart to get to the spiders that crawl in the pipes and the grit that gets into the open fittings. Spiders and grit plug up the orifices in the appliances. Just a suggestion you should take seriously.
In my next update, I will post final finished photos of this trailer. She is very close right now and will be leaving us this weekend.


Looks great Frank. Love the surf blue. The butterflies are a great solution for the jigsaw puzzle sub-floor. Might this be the girl that gets the overnighted floor covering? I hope that my explanation on sub-floor prep for Marmo installation was understandable.
ReplyDeleteAny cold malted barley beverages in that fridge?